EVERYTHING YOU SHOULD KNOW ABOUT LUXURY VINYL PLANK INSTALLATION
Luxury vinyl plank flooring is probably the most popular and flooring option amongst new homeowners and businesses. Luxury vinyl planks are less expensive, water-proof and scratch resistant. So if you are after that rustic, hardwood floor aesthetic, but want a cheaper more convenient option, definitely opt for this modern flooring material. Here’s what you need to know:
INSTALLING LUXURY VINYL PLANK FLOORING
The fact that this material is 100 % hand-made is definitely an advantage since you have such a variety of styles, colors and wood species to choose from. And it keeps on getting better from here. Not only does it have a multitude of styles to pick from, but luxury vinyl is also incredibly easy to install, making this material perfect for the DIY homeowner.
The installation process doesn’t require any overtly expensive power tools or excessive working hours due to its click together, tongue and groove design. Also, unlike other materials, these planks have the underlayment installed right into them! Here are the tools you would need to start this DIY flooring project:
-
Sharp Utility knife
-
Rubber mallet
-
Knee pads
-
Table saw (optional)
-
Pliers
And let’s continue this guide with the proper steps you will need to take to ensure your luxury vinyl planks are installed correctly.
PREPARING THE SUBFLOOR
Another benefit of vinyl planks is that they can be installed on any type of subfloor, be it wood, concrete or even vinyl. But you definitely need to do some preparation first such as fixing squeaky spots. If you do end up finding any loose spots, they can be fixed by nailing that part of the subfloor into the joist bellow it. Second, you should check the subfloor for any damage from mold and rot. Cleaning up any debris, removing carpet staples and patching up any holes are a-must.
CHOOSING A STARTING POINT
Once you’ve prepped the subfloor for your new vinyl flooring, the next step is more of a aesthetics choice. Luxury Vinyl Plank can either run front to back, making room feel deeper, or they can run side to side, making the room fell wider. Both are great and acceptable options. Again, this is entirely up to your visual preferences, but once you’ve decided, you should measure the perimeter to determine how many planks you will need. You may also need to utilize the utility knife (or table saw) in order to cut the planks down to their correct sizes.
MIXING AND MATCHING PLANKS
You took the plunge, you’ve ordered your very own luxury vinyl planks, but now they are in some boxes all over your floor. Take them out and start setting them down in various rooms, mixing and matching, to make sure you have enough variety of color and patterns spread out across your home.
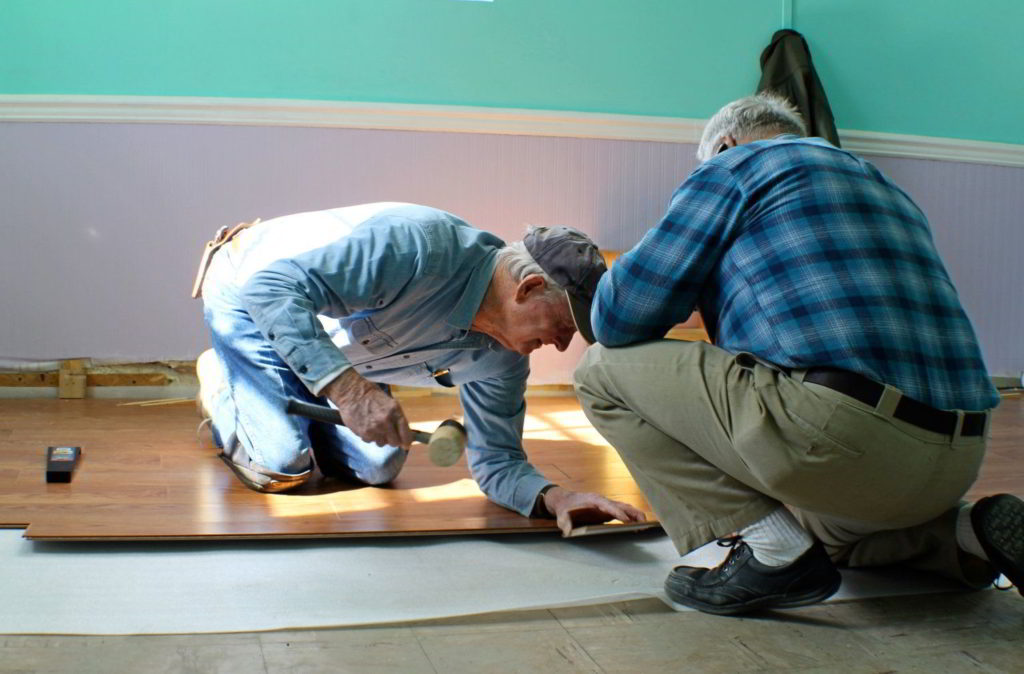
BEGINNING THE CLICK-TOGETHER PROCESS
Now that the planks are on your floor, all perfectly mixed and matched, you can start the fun part! And that is solving the jigsaw puzzle that comes in every box set of vinyl planks. Start by clicking them together and later securing them with the rubber mallet by hammering the joints, and as we’ve mentioned above, you might need to cut them in order for them to fit In some places.
CUTTING AROUND CORNERS
Here and there, you will run into some corners or weird angles. There is an easy solution to this problem. Simply take some measuring tape, measure the outline of the corner and use a pencil to mark it on the plank itself. Then take your utility knife (or saw) and cut out the piece you don’t need. The pliers will come in handy in this situation, making it easier to grip the excess piece.
FINISHING THE DIY PROJECT
We are sure this all seems very easy, and that’s because it is! You just need to do some finishing touches and your new vinyl flooring is all set and done. One thing you can do is to install a wide baseboard to bridge that small gap between the floor and the wall. Extra points for painting over the nails you’ve used to do this.
Adding new flooring to your home can be a hassle, and a costly one at that. Taking on this simple DIY project is a great way to add some flare, and on a budget too. It’s intuitive and thoughtful design makes it perfect for experienced homeowners and newbies alike!